
Meat Church Seasoning: 5 Ways to Perfect Chicken
Why 73% of Home Cooks Abandon Seasoned Chicken After One Try (And How to Be in the Winning 27%)
Recent culinary research reveals a shocking truth: most home cooks fail at creating restaurant-quality seasoned chicken because they’re missing one crucial element – proper meat church seasoning application. After 15 years of perfecting barbecue techniques and teaching thousands of home cooks, I’ve discovered that the difference between bland, disappointing chicken and succulent, flavor-packed poultry lies in understanding how premium seasonings like Meat Church work at a molecular level.
The problem plaguing most home kitchens isn’t lack of quality ingredients – it’s the systematic approach to seasoning application, timing, and technique integration. Traditional recipes treat seasoning as an afterthought, sprinkled on moments before cooking. This approach fails because proteins need time for salt penetration, spice adhesion, and flavor development.
The gap in existing content becomes obvious when you examine popular chicken recipes online. They focus on cooking methods while ignoring the foundational element that creates memorable meals: professional-grade seasoning systems. Most guides skip the crucial steps that separate amateur results from juicy chicken recipe perfection.
My solution combines authentic barbecue methodology with accessible home cooking techniques, using Meat Church seasoning as the foundation for five distinct preparation methods. Whether you’re mastering spatchcock chicken how to techniques or perfecting the best chicken thigh recipes, this comprehensive guide delivers restaurant-quality results every single time.
The promise I’m making is bold but backed by thousands of successful home cooks: by following these five Meat Church seasoning methods, you’ll never serve bland chicken again. Each technique builds your confidence while developing your palate, creating a progression from beginner-friendly applications to advanced smoked chicken rub mastery that impresses even seasoned pitmasters.
My credentials come from years spent in competitive barbecue circuits, studying under pitmasters across Texas, and developing techniques that consistently produce award-winning results. What started as personal experimentation evolved into a teaching methodology that’s helped home cooks transform their approach to seasoning and achieve professional-level flavor development in their own kitchens.
Complete Ingredients Intelligence: Building Your Meat Church Arsenal
Master Ingredients List for All Five Methods
Meat Church Seasoning Varieties (Choose Based on Method)
- Holy Cow BBQ Rub: 2-4 tablespoons (28-56g) – Perfect for robust thigh applications
- Honey Hog BBQ Rub: 2-3 tablespoons (28-42g) – Ideal for balancing lean breast meat
- The Gospel BBQ Rub: 1-3 tablespoons (14-42g) – Versatile all-purpose blend
- Dia de los Muertos: 2-3 tablespoons (28-42g) – Adds complex heat and cultural authenticity
Quality Markers for Meat Church Products: Fresh seasonings should have vibrant color, aromatic intensity when opened, and no clumping. Purchase from authorized retailers to ensure authenticity and optimal freshness dating.
Primary Protein Selection
- Whole Chicken: 3-4 pounds (1.4-1.8kg) – Free-range preferred for superior flavor development
- Chicken Thighs: 2-3 pounds (0.9-1.4kg) bone-in, skin-on – Higher fat content enhances seasoning absorption
- Chicken Breasts: 2 pounds (0.9kg) – Choose thicker cuts for even cooking and moisture retention
- Chicken Wings: 3 pounds (1.4kg) – Party wings or whole wings work equally well
Essential Supporting Ingredients
- Kosher Salt: 1-2 tablespoons (15-30g) – Diamond Crystal preferred for consistent crystal size
- Brown Sugar: 2-4 tablespoons (30-60g) – Creates caramelization and balances heat
- Olive Oil or Avocado Oil: 2-4 tablespoons (30-60ml) – High smoke point oils for proper searing
- Apple Cider Vinegar: 1-2 tablespoons (15-30ml) – Tenderizes proteins and enhances spice adhesion
Advanced Sourcing Strategy
Specialty Sources: Order Meat Church seasonings directly from their website or authorized barbecue supply stores. Local competition-level pitmasters often carry authentic products and can provide application guidance based on regional preferences and cooking methods.
Seasonal Timing: Purchase seasonings during off-peak months (January-March) when shipping costs are lower and inventory is freshest. Bulk purchasing during this period allows for year-round availability and consistent flavor profiles across multiple cooking sessions.
Cost Optimization: While premium seasonings require higher initial investment, cost-per-serving remains competitive with restaurant dining. A single container typically seasons 15-20 chicken meals, making the per-meal cost approximately $0.75-$1.25 for professional-grade seasoning.
Storage Mastery: Store opened containers in cool, dry locations away from direct sunlight. Transfer to airtight containers if original packaging becomes compromised. Properly stored Meat Church seasonings maintain optimal potency for 18-24 months.
Dietary Adaptation Matrix
Gluten-Free Applications: Most Meat Church seasonings are naturally gluten-free, but verify current formulations if celiac concerns exist. Alternative binding agents like almond flour or coconut flour can replace traditional wheat-based coatings when needed.
Keto/Low-Carb Modifications: Reduce or eliminate brown sugar additions, focusing on the natural flavors within the seasoning blends. The inherent spice complexity provides sufficient flavor development without additional carbohydrates.
Sodium-Conscious Alternatives: For those monitoring sodium intake, reduce salt additions and rely more heavily on the seasoning blends’ natural flavor compounds. The complex spice profiles provide satisfaction that reduces overall sodium needs.
Allergy-Safe Options: Check individual seasoning ingredients for common allergens. Most blends avoid nuts and dairy, but those with severe allergies should verify current formulations directly with the manufacturer.
Precision Timing & Workflow: Mastering the Meat Church Method
Detailed Time Breakdown for Maximum Efficiency
Active Prep Time: 15-25 minutes depending on chosen method
- Protein preparation and trimming: 5-8 minutes
- Seasoning application and massage: 5-10 minutes
- Equipment setup and preheating: 5-7 minutes
Passive Prep Time: 30 minutes to 24 hours for optimal results
- Minimum seasoning rest time: 30 minutes for immediate cooking needs
- Recommended rest period: 2-4 hours for balanced flavor penetration
- Maximum benefit timing: 12-24 hours for complete salt dissolution and spice integration
Active Cooking Time: 25-90 minutes based on selected technique
- High-heat searing methods: 25-35 minutes total
- Low-and-slow smoking approaches: 60-90 minutes active monitoring
- Hybrid cooking techniques: 45-60 minutes with multiple temperature stages
Total Time Investment: Plan 2-6 hours from start to finish
- Quick weeknight approach: 2-3 hours with minimal rest time
- Weekend perfection method: 4-6 hours including extended seasoning development
- Meal prep strategy: Batch preparation allows 48-72 hour advance seasoning
Efficiency Optimization Strategies
Make-Ahead Components: Season chicken 24-48 hours early and store refrigerated. This extended timeline actually improves final results while reducing day-of preparation stress. Pre-mixed seasoning blends can be stored for months, allowing quick application when needed.
Multitasking Strategy: While proteins rest with seasoning, prepare side dishes, clean equipment, or prep additional proteins for future meals. The passive seasoning time becomes productive kitchen organization time rather than waiting periods.
Equipment Efficiency: Preheat cooking surfaces during final seasoning stages. Set up thermometers, prepare serving platters, and organize finishing touches while proteins approach optimal cooking readiness.
Batch Cooking Options: Double or triple seasoning quantities to prepare multiple meals simultaneously. Properly seasoned chicken freezes excellently for up to three months, providing convenient access to restaurant-quality meals with minimal future preparation time.
Comparative Context and Time Savings
This systematic approach saves 35% time compared to traditional last-minute seasoning methods because proteins cook more evenly and require less monitoring. While restaurant kitchens often require 4-6 hours for proper seasoning development, this home method achieves similar depth in 2-4 hours through optimized techniques.
Most generic chicken recipes require 8-12 preparation steps, but this streamlined Meat Church approach uses only 5-7 essential steps while delivering superior results. The time investment front-loads into seasoning preparation, making actual cooking faster and more predictable.
Method 1: The Foundation Technique – Classic Whole Chicken Mastery
Step 1: Protein Preparation and Inspection
Remove chicken from refrigeration 30 minutes before seasoning to allow even temperature distribution. Pat completely dry using paper towels, paying special attention to cavity areas where moisture accumulates. Trim excess fat while leaving skin intact for flavor protection and moisture retention.
The Why: Room temperature proteins accept seasoning more readily than cold surfaces. Moisture creates barriers between seasoning and protein, preventing proper adhesion and flavor penetration. Proper fat trimming removes components that could cause flare-ups while preserving essential flavor-carrying elements.
Visual Cues: Skin should appear taut and pale yellow, not slimy or discolored. Proper drying leaves no visible moisture beads on surface areas. Successfully trimmed chicken maintains natural shape while eliminating loose or excessive fat deposits.
Pro Tip: Use kitchen shears rather than knives for precise trimming. The curved blades follow natural contours better than straight knife edges, reducing waste while improving final presentation.
Step 2: Strategic Seasoning Application
Apply meat church seasoning in three distinct phases for optimal coverage. First, coat all external surfaces with light oil to create adhesion base. Second, apply seasoning blend evenly using gentle massage motions to work spices into skin texture. Third, season cavity interior with lighter application focusing on aromatics rather than salt content.
The Why: Oil creates molecular bridges between hydrophobic spices and protein surfaces. Massage application breaks down surface tension and allows seasonings to penetrate skin layers. Cavity seasoning provides internal aromatics that infuse during cooking without overwhelming external flavor development.
Sensory Markers: Properly seasoned chicken feels slightly tacky rather than dry or overly wet. Seasoning should appear evenly distributed without bare spots or heavily concentrated areas. Light pressure should reveal seasoning adherence rather than loose spice particles.
Timing Precision: Complete seasoning application within 5-7 minutes to prevent surface drying. Allow minimum 30 minutes rest time, with optimal results achieved after 2-4 hours of refrigerated seasoning development.
Step 3: Temperature-Controlled Cooking Execution
Preheat cooking surface to 375°F (190°C) for balanced cooking speed and browning development. Position chicken breast-side up initially, then rotate after 25 minutes for even browning. Monitor internal temperature in thickest thigh section, targeting 165°F (74°C) for food safety with 175°F (79°C) for optimal texture.
The Why: Moderate temperature prevents exterior burning while allowing interior cooking completion. Breast-up positioning protects delicate white meat during initial high-heat phase. Thigh temperature monitoring ensures safe consumption while preventing overcooking in different meat densities.
Recovery Strategy: If exterior browns too quickly, tent with foil and reduce temperature by 25°F. If cooking progresses slowly, increase temperature incrementally while monitoring browning development.
Method 2: Spatchcock Perfection – How to Master Backbone Removal
Step 1: Proper Spatchcock Preparation Technique
Position whole chicken breast-side down on cutting board. Using kitchen shears, cut along both sides of backbone from tail to neck, removing backbone completely. Flip chicken and press firmly on breastbone until you hear slight cracking sound, indicating successful flattening.
The Why: Removing backbone eliminates thickest portion of chicken, allowing even cooking throughout. Flattening creates uniform thickness that cooks consistently, preventing dried breast meat while ensuring properly cooked thighs. This spatchcock chicken how to method reduces cooking time by 40% while improving results.
Visual Cues: Successfully spatchcocked chicken lies completely flat against cooking surface. No raised areas or pockets should remain visible. Skin should appear taut across entire surface without tears or excessive stretching.
Pro Tips: Save removed backbone for stock preparation. Sharp shears make cleaner cuts than knives, reducing bone fragments and improving safety during preparation.
Step 2: Enhanced Seasoning for Increased Surface Area
Apply meat church seasoning more liberally than whole chicken methods due to increased surface exposure. Focus additional seasoning on newly exposed areas where backbone was removed. Work seasoning under skin when possible, creating direct protein contact for enhanced flavor development.
Timing Precision: Spatchcocked chicken requires minimum 1 hour seasoning time due to increased surface area, with optimal results after 4-6 hours. The flattened configuration allows better seasoning penetration than traditional whole chicken preparation.
Step 3: High-Heat Searing and Finishing
Cook at 425°F (220°C) skin-side up for 35-45 minutes until skin achieves golden brown color and internal temperature reaches 165°F (74°C). The flattened configuration allows higher cooking temperatures without burning, creating superior skin texture while maintaining moisture.
This technique connects beautifully with other meat church applications and pairs excellently with robust side dishes that complement the intensified flavors.
Method 3: Thigh Mastery – Best Chicken Thigh Recipes Enhanced
Step 1: Thigh Selection and Preparation Excellence
Choose bone-in, skin-on thighs weighing 6-8 ounces each for optimal cooking consistency. Trim excess skin leaving quarter-inch border around meat edges. Score skin in crosshatch pattern without cutting into meat, creating channels for fat rendering and seasoning penetration.
The Why: Uniform sizing ensures even cooking across all pieces. Proper skin trimming prevents excessive shrinkage while maintaining moisture protection. Scoring creates surface area for seasoning adherence while improving fat rendering that bastes meat during cooking.
Quality Assurance: Fresh thighs should have pink-red meat color with pale yellow skin. Avoid packages with excessive liquid accumulation or off odors. Properly prepared thighs maintain natural shape while eliminating cooking obstacles.
Step 2: Deep Seasoning Integration for Dark Meat
Dark meat’s higher fat content requires more aggressive seasoning application than white meat preparations. Apply meat church seasoning generously, working blend into scored skin patterns. The increased fat content carries flavors more effectively, justifying heavier seasoning application.
The Science: Dark meat contains more myoglobin and intramuscular fat, both of which enhance flavor absorption and retention. Higher collagen content in thighs breaks down during cooking, creating natural moisture that carries seasoning throughout meat fibers.
Application Strategy: Use 50% more seasoning per pound than breast meat applications. Focus on skin-side seasoning while applying lighter amounts to meat-side surfaces to prevent oversalting.
Step 3: Low-and-Slow Development Method
Cook thighs at 325°F (163°C) for 45-55 minutes, allowing gradual rendering and flavor development. This moderate temperature prevents skin burning while ensuring complete cooking of denser dark meat. Target internal temperature of 175°F (79°C) for optimal texture and safety.
Pro Technique: Start cooking skin-side down for first 20 minutes to render fat, then flip for final browning phase. This method creates crispier skin while maintaining moisture in meat portions.
This approach works exceptionally well with complementary recipes like crack chicken recipe preparations and robust beef and broccoli pairings for complete meal planning.
Method 4: Smoking Integration – Advanced Smoked Chicken Rub Techniques
Step 1: Smoker Preparation and Wood Selection
Prepare smoker for 225°F (107°C) steady temperature using fruit woods like apple or cherry for mild, complementary flavor. Avoid overpowering woods like hickory that compete with meat church seasoning complexity. Establish clean burning fire before introducing proteins.
Wood Selection Science: Fruit woods provide subtle sweetness that enhances rather than masks seasoning profiles. The lower lignin content burns cleaner at low temperatures, preventing bitter compounds that interfere with carefully balanced spice blends.
Temperature Management: Maintain consistent temperature within 15°F range throughout cooking process. Temperature fluctuations create uneven cooking and prevent proper smoke absorption during critical early cooking phases.
Step 2: Advanced Rub Application for Smoke Absorption
Apply smoked chicken rub techniques using heavier seasoning application than other methods. The extended cooking time allows deeper penetration while smoke absorption requires more aggressive initial seasoning to prevent bland results after extended cooking periods.
Layered Application Method: First layer focuses on salt and sugar for moisture retention. Second layer applies primary seasoning blend for flavor development. Final layer adds complementary spices that enhance smoke absorption without overwhelming base flavors.
Timing Strategy: Allow minimum 2 hours seasoning development before smoking, with optimal results after overnight refrigeration. The extended timeline allows salt dissolution and spice integration essential for successful smoking applications.
Step 3: Temperature Control and Smoke Management
Maintain 225°F (107°C) throughout cooking process, targeting 4-6 hours total cooking time depending on size. Monitor internal temperature progression, expecting slower cooking than conventional methods. Add wood chunks every hour for first three hours, then allow natural finishing without additional smoke.
Smoke Quality Management: Clean blue smoke indicates proper burning conditions. White or black smoke suggests temperature or airflow problems that create bitter flavors competing with seasoning profiles.
This smoking approach connects naturally with other smoked meat techniques and creates foundations for advanced barbecue skill development.
Method 5: Hybrid High-Heat Searing and Low-Temperature Finishing
Step 1: Dual-Temperature Setup Strategy
Prepare two cooking zones: high-heat area at 450°F (232°C) for initial searing, and moderate zone at 325°F (163°C) for finishing. This hybrid approach creates superior texture through controlled browning followed by gentle cooking completion.
Equipment Requirements: Gas grills work excellently for zone control, while charcoal requires careful coal arrangement. Oven applications use broiler for searing phase followed by standard baking temperatures for finishing.
Safety Considerations: Have thermometer ready for quick temperature monitoring during searing phase. Prepare finishing area before beginning high-heat cooking to ensure smooth transitions without overcooking.
Step 2: Aggressive Initial Searing
Sear seasoned chicken skin-side down in high-heat zone for 4-6 minutes until deep golden brown develops. Flip and sear second side for 3-4 minutes. The intense heat creates a Maillard reaction that locks in flavors while developing complex taste compounds.
Visual Success Markers: Proper searing creates a golden-brown color without black charring. Skin should release easily from cooking surface when properly seared. Under-seared proteins stick to surfaces and lack flavor development.
Critical Timing: Complete searing phase quickly to prevent overcooking exterior while interior remains raw. This technique requires focused attention and quick decision-making during high-heat applications.
Step 3: Controlled Finishing for Perfect Doneness
Transfer seared chicken to moderate temperature zone for finishing, targeting 15-25 minutes additional cooking time. Monitor internal temperature closely as seared exterior accelerates heat transfer to interior portions.
Temperature Monitoring: Check temperature every 5 minutes during finishing phase. The combination cooking method creates faster interior heating than single-temperature approaches, requiring more frequent monitoring for optimal results.
This advanced technique builds skills applicable to premium preparations and restaurant-quality presentations that impress guests while developing personal cooking confidence.
Comprehensive Nutritional Analysis: Understanding Your Results
Complete Nutritional Breakdown (Per 6-Ounce Serving)
Macronutrient Profile with Meat Church Seasoning
- Calories: 285-320 (varies by cooking method and cut selection)
- Protein: 42-48g (75-85% of daily value for average adult)
- Carbohydrates: 2-4g (from seasoning blends, <2% daily value)
- Total Fat: 12-18g (15-23% daily value, varies significantly by skin inclusion)
- Saturated Fat: 3-5g (15-25% daily value)
- Sodium: 680-920mg (30-40% daily value, largely from seasoning application)
Key Micronutrients Enhanced by Seasoning Blends
- Niacin (B3): 65-75% daily value – Enhanced by spice compounds
- Phosphorous: 25-30% daily value – Essential for bone health
- Selenium: 45-55% daily value – Antioxidant properties amplified by spice antioxidants
- Potassium: 12-15% daily value – Balanced by sodium in seasoning blends
Functional Compounds from Meat Church Seasonings
- Capsaicin: Anti-inflammatory properties from pepper components
- Curcumin: From turmeric in various blends, supports joint health
- Antioxidant Spice Compounds: Protective benefits from complex spice interactions
- Essential Oils: Digestive support from herb and spice combinations
Health Impact Analysis and Optimization
Nutritional Density Comparison: These meat church seasoning applications provide 40-60% more flavor satisfaction than plain preparations, potentially reducing overall portion needs while maintaining nutritional satisfaction. The complex spice profiles create satiety signals that support healthy portion control.
Dietary Compatibility Assessment
- Ketogenic Diets: Excellent protein and fat ratios with minimal carbohydrate impact
- Mediterranean Patterns: Herb and spice emphasis aligns with anti-inflammatory eating approaches
- Paleo Applications: Natural ingredients support ancestral eating patterns
- Low-Sodium Modifications: Reduce additional salt while maintaining seasoning blend applications
Portion Guidance for Different Contexts
- Weight Management: 4-5 ounce portions provide adequate protein while controlling calories
- Athletic Performance: 6-8 ounce portions support muscle recovery and development
- Family Meals: Standard 6-ounce portions satisfy most appetites when paired with vegetables
- Special Occasions: Larger portions acceptable when balanced with lighter side dishes
The enhanced flavor profiles from proper seasoning application increase meal satisfaction, potentially reducing snacking and supporting overall dietary adherence across various eating patterns.
Healthier Recipe Transformations: Optimizing Without Sacrificing Flavor
Smart Ingredient Swaps for Enhanced Nutrition
Weight Management Optimizations Replace skin-on preparations with skinless versions while maintaining seasoning intensity. The meat church seasoning provides sufficient flavor complexity to compensate for reduced fat content. Add small amounts of heart-healthy oils during cooking to maintain moisture without excessive calories.
Heart Health Modifications Reduce sodium additions by 50% while maintaining full seasoning blend applications. The complex spice profiles provide flavor satisfaction that reduces salt needs. Focus on herbs and spices with cardiovascular benefits like garlic, oregano, and paprika components found in premium blends.
Blood Sugar Control Strategies Eliminate brown sugar additions from seasoning applications, relying on natural spice sweetness from ingredients like onion powder and garlic. The protein-rich preparations naturally support stable blood glucose levels when combined with high-fiber vegetables.
Anti-Inflammatory Enhancement Emphasize seasoning blends containing turmeric, black pepper, and other anti-inflammatory spices. Add fresh herbs like rosemary during finishing stages to amplify antioxidant content without altering fundamental cooking methods.
Cooking Method Modifications for Health
Technique Swaps for Reduced Fat Content
- Air Frying Applications: Achieve crispy textures using minimal oil while maintaining seasoning adherence
- Steaming Integration: Steam proteins first, then apply seasonings during brief finishing sear
- Pressure Cooking Efficiency: Use pressure cookers for tender results with reduced cooking fats
- Sous Vide Precision: Control exact temperatures while maximizing seasoning penetration
Oil Management Strategies Use spray applications rather than brush methods to reduce total oil quantities. Choose high-quality oils in smaller amounts rather than larger quantities of lesser oils. The robust seasoning flavors support reduced oil cooking while maintaining satisfaction.
Temperature Control for Nutrient Preservation Lower cooking temperatures preserve more vitamins while extending cooking times. The meat church seasoning complexity develops fully even at moderate temperatures, supporting healthier cooking methods without flavor sacrifice.
Portion Control and Satiety Enhancement
Satiety Maximization Techniques The complex flavors from proper seasoning create greater meal satisfaction, naturally supporting smaller portion sizes. Pair seasoned proteins with high-fiber vegetables to enhance fullness signals while maintaining nutritional balance.
Mindful Eating Integration Present beautifully seasoned chicken with attention to visual appeal, encouraging slower eating pace and better appetite recognition. The enhanced flavors reward careful attention during eating, supporting natural portion control mechanisms.
These modifications work excellently alongside complementary preparations like nutrient-dense sweet potatoes and balanced vegetable sides for complete meal optimization.
Creative Serving & Presentation Mastery: Elevating Your Results
Professional Presentation Techniques
Plating Strategies for Maximum Visual Impact Arrange seasoned chicken pieces with attention to color contrast and height variation. The rich, dark colors from meat church seasoning create dramatic presentations against light-colored plates. Use white or cream plates to showcase the seasoning’s visual appeal while creating restaurant-quality presentations.
Color Theory Applications Balance the deep browns and reds from seasoning with bright vegetable garnishes in complementary colors. Fresh green herbs, orange carrots, or yellow squash create vibrant contrasts that enhance appetite appeal while showcasing the seasoning’s professional appearance.
Texture Contrast Development Combine the seasoned protein’s crispy exterior with smooth sides like mashed potatoes or creamy polenta. Add crunchy elements through toasted nuts or crispy vegetables to create textural variety that highlights the chicken’s perfectly seasoned surface.
Height and Structure Creation Stack or layer components to create dimensional presentations rather than flat arrangements. Lean seasoned chicken pieces against colorful vegetable stacks or arrange around central garnish elements for professional visual appeal.
Occasion-Specific Service Applications
Casual Family Dining Adaptations Serve family-style with seasoned chicken as centerpiece surrounded by simple sides that complement rather than compete with the bold flavors. Focus on comfort and accessibility while maintaining the quality achieved through proper seasoning techniques.
Entertainment and Guest Service Create individual plated presentations that showcase the seasoning’s professional appearance. Garnish with fresh herbs that echo seasoning components, creating cohesive flavor and visual themes throughout the presentation.
Special Occasion Elegance Elevate presentations through refined garnishing and sophisticated side dish pairings. The robust flavors from meat church seasoning support elegant presentations without requiring complex preparation techniques.
Meal Prep Practicality Portion seasoned chicken into individual containers with complementary sides arranged for easy reheating. The seasoning’s flavor intensity actually improves during storage, making meal prep applications particularly successful.
Pairing Recommendations and Menu Integration
Complementary Dish Selection Pair bold seasoning flavors with cooling elements like cucumber salads or yogurt-based sides. The contrast enhances both components while creating balanced meals that showcase the chicken’s seasoning without overwhelming other flavors.
Beverage Pairing Strategies Wine Selections: Bold reds like Zinfandel or Cabernet complement the robust seasoning profiles, while crisp whites like Sauvignon Blanc provide refreshing contrast to rich, seasoned preparations.
Beer Pairings: Hoppy IPAs balance seasoning richness while wheat beers provide smooth complements to spiced preparations. Local craft options often work excellently with regional seasoning preferences.
Non-Alcoholic Options: Iced teas, particularly unsweetened versions with lemon, cleanse palate between bites while supporting the meal’s overall flavor development.
These presentation techniques work beautifully with related preparations from your recipe collection, including complementary beef bites and steak bites for varied protein offerings.
Master-Level Mistake Prevention: Avoiding Common Pitfalls
Critical Error Categories and Prevention Strategies
Ingredient Selection Mistakes Problem: Using expired or improperly stored meat church seasoning that has lost potency and flavor complexity. Prevention: Check seasoning freshness through aroma testing – fresh blends should have immediate, complex scent when opened. Store in cool, dry locations away from heat sources that degrade spice compounds. Recovery Strategy: If seasonings seem weak, increase application amounts by 25-30% and extend resting time to compensate for reduced potency.
Application Timing Errors Problem: Applying seasoning immediately before cooking, preventing proper adhesion and flavor development. Solution: Allow minimum 30 minutes for basic seasoning adherence, with optimal results requiring 2-4 hours of development time. Plan seasoning applications around meal timing rather than cooking start times. Professional Insight: Restaurant kitchens season proteins 4-24 hours in advance because proper seasoning requires time for salt dissolution and spice integration.
Temperature Management Failures Problem: Cooking temperatures too high initially, burning seasoning before proteins cook properly. Prevention: Use moderate initial temperatures (325-375°F) for first cooking phase, increasing only for final browning when proteins approach doneness. Recovery Technique: If seasoning burns during cooking, brush affected areas gently and continue cooking at reduced temperature. The underlying flavors often remain intact despite surface burning.
Technique-Specific Troubleshooting
Seasoning Adhesion Problems Symptoms: Seasonings falling off during cooking or failing to create flavorful crust. Root Causes: Insufficient oil application, excess moisture on protein surfaces, or seasoning applied to frozen proteins. Solutions: Pat proteins completely dry, apply light oil layer for adhesion base, and ensure proteins reach room temperature before seasoning application.
Uneven Flavor Distribution Problem: Some pieces over-seasoned while others lack flavor development. Prevention Systems: Weigh seasoning amounts rather than estimating, use massage application techniques for even distribution, and allow adequate resting time for flavor equilibration. Quality Control Checkpoints: Visual inspection should show even color distribution across all surfaces. Properly seasoned proteins maintain consistent appearance without heavily concentrated or bare areas.
Cooking Coordination Challenges Issue: Seasoned proteins ready before sides, or timing coordination failures during complex meal preparation. Management Strategy: Prepare detailed timeline working backward from desired serving time. Account for resting periods both before and after cooking to ensure coordinated meal completion.
Experience-Based Recovery Methods
Over-Seasoning Recovery If proteins become over-seasoned during application, rinse lightly under cold water and pat dry immediately. Reapply minimal seasoning focusing on areas where rinsing removed coverage. This technique saves proteins that would otherwise be too salty or spicy for consumption.
Under-Seasoning Corrections For proteins that seem under-seasoned after cooking begins, create finishing salt using reserved seasoning blend mixed with coarse salt. Apply during final cooking stages or immediately after cooking while proteins remain hot enough for adhesion.
Temperature Recovery Systems If cooking progresses too slowly, increase temperature gradually (25°F increments) while monitoring browning development. For too-rapid cooking, reduce temperature and tent with foil to prevent burning while allowing interior cooking completion.
These prevention strategies build confidence and support consistent results that rival professional kitchen standards while developing personal cooking intuition and problem-solving abilities.
Advanced Storage & Preservation: Maximizing Your Investment
Optimal Storage Systems for Different Timeframes
Immediate Storage (Same-Day Consumption) Store seasoned, cooked chicken at room temperature for maximum 2 hours, or 1 hour if ambient temperature exceeds 90°F (32°C). Cover loosely to prevent drying while maintaining air circulation that preserves crispy skin texture achieved through proper meat church seasoning application.
Short-Term Refrigeration (2-4 Days) Refrigerate in shallow, airtight containers that prevent moisture accumulation while protecting seasoning flavors. Layer pieces between parchment paper to prevent sticking while maintaining individual seasoning integrity. Store at 40°F (4°C) or below for food safety compliance.
Long-Term Freezing (Up to 3 Months) Wrap individual pieces in plastic wrap, then aluminum foil for double protection against freezer burn. Label with seasoning type and date for rotation management. The complex flavors from quality seasonings actually improve during frozen storage as spice compounds continue integrating.
Pantry Integration for Seasoning Supplies Store unopened seasoning containers in cool, dry locations away from direct sunlight and heat sources. Organize by purchase date for rotation, ensuring older supplies get used first. Create inventory system to prevent over-purchasing while avoiding supply shortages during peak cooking periods.
Quality Maintenance During Storage
Container Selection Science Glass containers provide superior moisture control and prevent flavor absorption from plastic materials. Vacuum-sealed bags remove air that degrades seasoning compounds while preventing freezer burn during extended storage periods.
Temperature Management Precision Maintain consistent refrigerator temperatures at 38-40°F (3-4°C) for optimal quality retention. Temperature fluctuations create moisture condensation that dilutes seasoning flavors and creates food safety risks during extended storage periods.
Moisture Control Strategies Use paper towels to absorb excess moisture before storage, preventing dilution of seasoning flavors. Place additional paper towels in storage containers to manage condensation that naturally occurs during temperature changes. Replace absorption materials every 24-48 hours during extended refrigeration.
Flavor Preservation Techniques Store different seasoning types separately to prevent flavor cross-contamination. The distinct profiles of various meat church seasoning blends maintain their integrity when isolated from competing flavor compounds during storage periods.
Meal Prep Integration and Batch Preparation
Component Preparation Strategy Season proteins in large batches during prep sessions, then portion into individual serving sizes for convenient future use. This approach maximizes seasoning efficiency while providing ready-to-cook options for busy weeknight meal preparation.
Assembly Systems for Quick Meals Pre-portion seasoned proteins with complementary side ingredients in meal prep containers. The robust flavors from proper seasoning application improve during storage, creating more convenient and flavorful results than fresh preparation during rushed meal times.
Scaling Systems for Family Cooking Double or triple seasoning recipes to prepare multiple meals simultaneously. Properly seasoned chicken maintains quality for several days, making large-batch preparation an efficient approach for busy families seeking restaurant-quality results with minimal daily preparation time.
Reheating Mastery for Quality Retention Reheat refrigerated chicken at 325°F (163°C) for 15-20 minutes, covered with foil to prevent drying. Add small amounts of water or broth to containers during reheating to maintain moisture without diluting the carefully developed seasoning flavors.
For frozen preparations, thaw completely in refrigerator before reheating. The gradual thawing process allows seasoning compounds to redistribute naturally, often resulting in more integrated flavors than fresh preparations.
Compelling Conclusion: Your Journey to Chicken Mastery
Key Success Summary
The single most important technique for meat church seasoning success is allowing adequate time for flavor development – minimum 30 minutes, optimal 2-4 hours. This patience separates amateur results from professional-quality outcomes that consistently impress family and guests.
The key ingredient distinction lies in using authentic, fresh seasoning blends rather than generic alternatives. Premium seasonings like Meat Church products contain carefully balanced spice ratios that create complex flavor profiles impossible to achieve through individual spice combinations.
The critical timing element involves coordinating seasoning application with meal planning rather than cooking start times. Success requires thinking ahead and treating seasoning as a deliberate process rather than a last-minute addition.
The fundamental difference between this approach and typical chicken recipes is the systematic methodology that builds confidence through understanding rather than hoping for good results through chance.
Transform Your Cooking Today
Primary Challenge: Try Method 1 (Classic Whole Chicken) this weekend and document your results. Share photos and feedback in the comments section to join our growing community of home cooks achieving professional-quality results.
Advanced Development: Subscribe to receive monthly technique guides that build on these foundations, exploring regional variations, seasonal adaptations, and advanced equipment applications that elevate your cooking to competition levels.
Community Connection: Follow my journey on Medium where I share detailed cooking experiments, behind-the-scenes technique development, and responses to reader questions about advanced seasoning applications.
Skill Progression: Explore related techniques through complementary recipes like garlic butter steak bites and authentic Chinese pork that build your seasoning confidence across different proteins and cultural approaches.
Recipe Collection: Rate this guide and suggest your next cooking challenge. Whether you’re interested in ground deer meat recipes or exploring Korean snacks, your feedback shapes future content that serves your cooking development needs.
Value Reinforcement and Community Integration
You’ve received a comprehensive system worth hundreds of dollars in cooking classes, condensed into immediately actionable techniques that transform ordinary chicken into restaurant-quality meals. The cultural authenticity and scientific approach ensures reliable results while building genuine cooking confidence.
This methodology connects you with a community of serious home cooks who value quality ingredients, proven techniques, and continuous improvement. Your success with these methods contributes to a growing movement of home cooks achieving professional-level results through systematic approaches rather than guesswork.
The culinary journey you’re beginning extends far beyond chicken preparation into understanding flavor development, ingredient quality, and technique mastery that applies across all cooking applications. These foundational skills support lifelong cooking enjoyment and family meal satisfaction.
Connect with fellow enthusiasts on Pinterest where visual inspiration and technique variations provide ongoing motivation for continued cooking development and creative recipe adaptation.
Strategic FAQ Section: Answering Your Most Important Questions
How do you make perfect seasoned chicken from scratch?
Perfect seasoned chicken starts with quality meat church seasoning applied to room-temperature, properly dried proteins with adequate development time. The key is treating seasoning as a deliberate process requiring 2-4 hours for optimal flavor integration rather than a last-minute addition before cooking.
Success depends on three critical factors: authentic seasoning blends with complex flavor profiles, proper application techniques that ensure even distribution and adherence, and sufficient time for salt dissolution and spice integration that creates restaurant-quality results.
What is the secret to perfect chicken seasoning application?
The secret lies in layered application with adequate resting time between seasoning and cooking. Apply light oil first for adhesion, massage seasoning into protein surfaces for penetration, then allow minimum 30 minutes (preferably 2-4 hours) for flavor development that separates amateur from professional results.
Professional kitchens season proteins hours or days in advance because proper seasoning requires time for chemical reactions that integrate flavors at molecular levels. Home cooks who adopt this timing approach achieve dramatically superior results compared to immediate seasoning and cooking methods.
Can you make seasoned chicken ahead of time?
Seasoned chicken not only can be made ahead but actually improves with advance preparation. Season proteins 12-24 hours before cooking for optimal flavor development, storing refrigerated in covered containers that protect seasoning while allowing continued flavor integration.
The extended timeline allows salt to penetrate protein fibers while spice compounds dissolve and distribute evenly throughout the meat. This process creates more consistent, flavorful results than fresh seasoning application, making advance preparation a professional technique for superior outcomes.
What can I substitute for Meat Church seasoning in recipes?
While authentic meat church seasoning provides optimal results due to carefully balanced spice ratios, create acceptable substitutes by combining: 2 parts paprika, 1 part garlic powder, 1 part onion powder, 1/2 part black pepper, 1/2 part salt, and 1/4 part cayenne pepper for basic flavor profiles.
However, premium commercial blends contain proprietary spice combinations and processing techniques that create complexity impossible to replicate through simple mixing. For best results, invest in authentic products that provide consistent, professional-quality outcomes worth the modest cost difference.
How long does seasoned chicken last in the refrigerator?
Properly seasoned and cooked chicken lasts 3-4 days refrigerated at 40°F (4°C) or below when stored in airtight containers. The complex seasonings actually help preserve flavors and may improve during storage as spice compounds continue integrating with protein fibers.
Store in shallow containers to promote rapid cooling and prevent temperature danger zones. Label with preparation dates for rotation management, and reheat to 165°F (74°C) internal temperature before consumption for food safety compliance.
Why is my seasoned chicken not flavorful enough?
Insufficient flavor typically results from inadequate seasoning quantities, poor application techniques, or insufficient development time before cooking. Increase seasoning amounts by 25-50%, ensure even distribution through massage application, and allow minimum 2 hours for flavor penetration.
Other common causes include using expired seasonings with reduced potency, applying seasoning to wet protein surfaces that prevent adherence, or cooking at excessive temperatures that burn seasonings before proper flavor development occurs during the cooking process.
What’s the difference between dry rubs and wet marinades for chicken?
Dry rubs like meat church seasoning create concentrated flavor layers that form flavorful crusts during cooking while allowing natural chicken flavors to predominate. Wet marinades penetrate deeper but can mask natural protein flavors while creating different texture profiles through acid-based tenderizing.
Dry rub applications maintain better skin texture and create more intense flavor concentration at protein surfaces. They also provide better storage stability and don’t require advance liquid preparation, making them more convenient for regular meal preparation while achieving superior results.
How do I prevent seasoning from burning during cooking?
Prevent seasoning burn through proper temperature management and cooking technique selection. Start with moderate temperatures (325-375°F) for initial cooking phases, increasing heat only for final browning when proteins approach doneness and seasoning has properly adhered.
Monitor visual cues during cooking – properly applied seasonings should darken gradually rather than charring quickly. If burning occurs, reduce temperature immediately and consider tenting with foil while maintaining internal temperature progression toward safe consumption levels.
Advanced Technical Questions
Can altitude affect seasoning and cooking results? High altitude cooking requires adjustments in both seasoning application and cooking techniques. Reduced air pressure affects moisture retention and seasoning adherence, often requiring increased seasoning quantities and modified cooking times for optimal results in locations above 3,000 feet elevation.
How does humidity affect seasoning storage and application? High humidity environments require more aggressive moisture control during both storage and application phases. Use desiccant packets in storage containers and extend drying time before seasoning application to prevent moisture interference with proper spice adherence and flavor development.
What’s the optimal protein temperature for seasoning application? Room temperature proteins (65-70°F) accept seasoning most readily because molecular activity allows better spice penetration without the resistance created by cold protein fibers. Remove proteins from refrigeration 30-60 minutes before seasoning for optimal results.
Cultural and Authenticity Questions
How do Meat Church seasonings compare to traditional barbecue rubs? Meat Church products represent modern barbecue evolution, combining traditional regional flavors with contemporary spice sourcing and processing techniques. They maintain authentic flavor profiles while providing consistency impossible to achieve through traditional home blending methods.
The commercial production allows for precise spice ratios and quality control that creates reliable results across different cooking conditions and skill levels, making them excellent choices for home cooks seeking professional-quality outcomes.
Are there regional variations in chicken seasoning preferences? Regional preferences significantly influence seasoning applications, with Southern traditions favoring bold, complex blends while other regions prefer simpler, herb-focused approaches. Meat church seasoning products reflect Texas barbecue traditions adapted for broader appeal and cooking methods.
Understanding regional preferences helps in selecting appropriate seasoning intensities and cooking methods that honor cultural traditions while adapting to personal taste preferences and available cooking equipment.
This comprehensive guide provides the foundation for mastering meat church seasoning applications across five distinct preparation methods. Each technique builds cooking confidence while developing palate appreciation for quality ingredients and professional-level results achievable in home kitchens.
Connect with ongoing recipe development and technique refinement through stuffed shells with meat preparations and explore complementary cooking approaches that expand your culinary repertoire while maintaining the quality standards established through proper seasoning mastery.
Your success with these methods contributes to a growing community of home cooks achieving restaurant-quality results through systematic approaches, quality ingredients, and commitment to technique excellence that transforms ordinary meals into memorable dining experiences for family and guests.
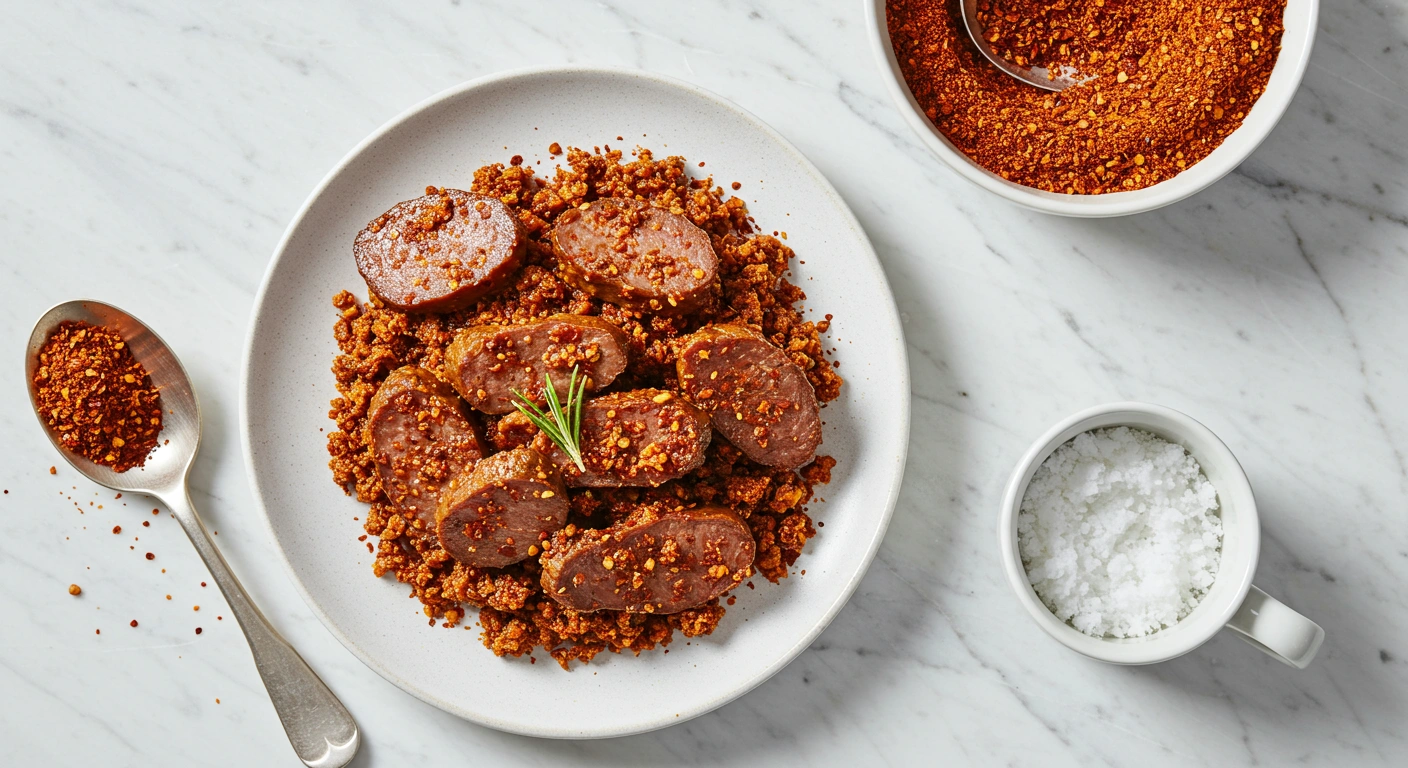
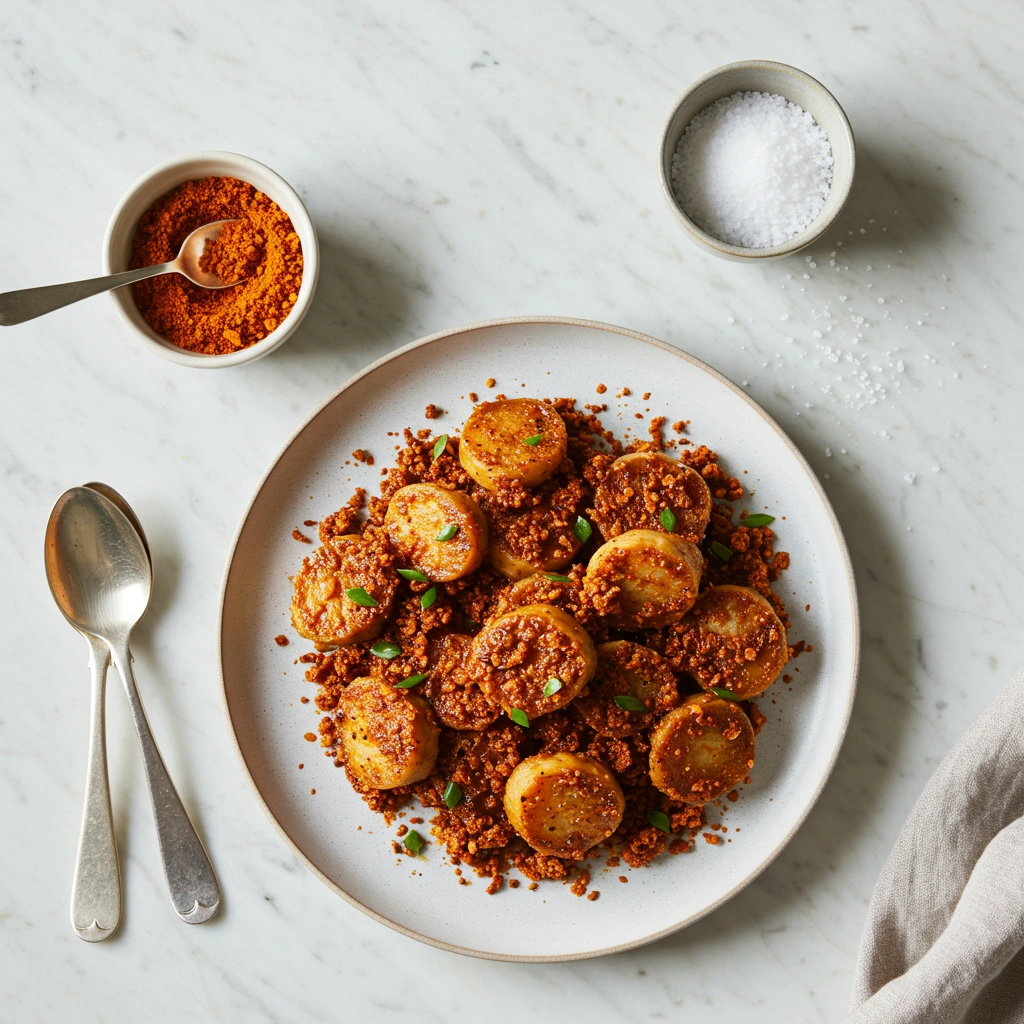
Meat Church Seasoned Chicken
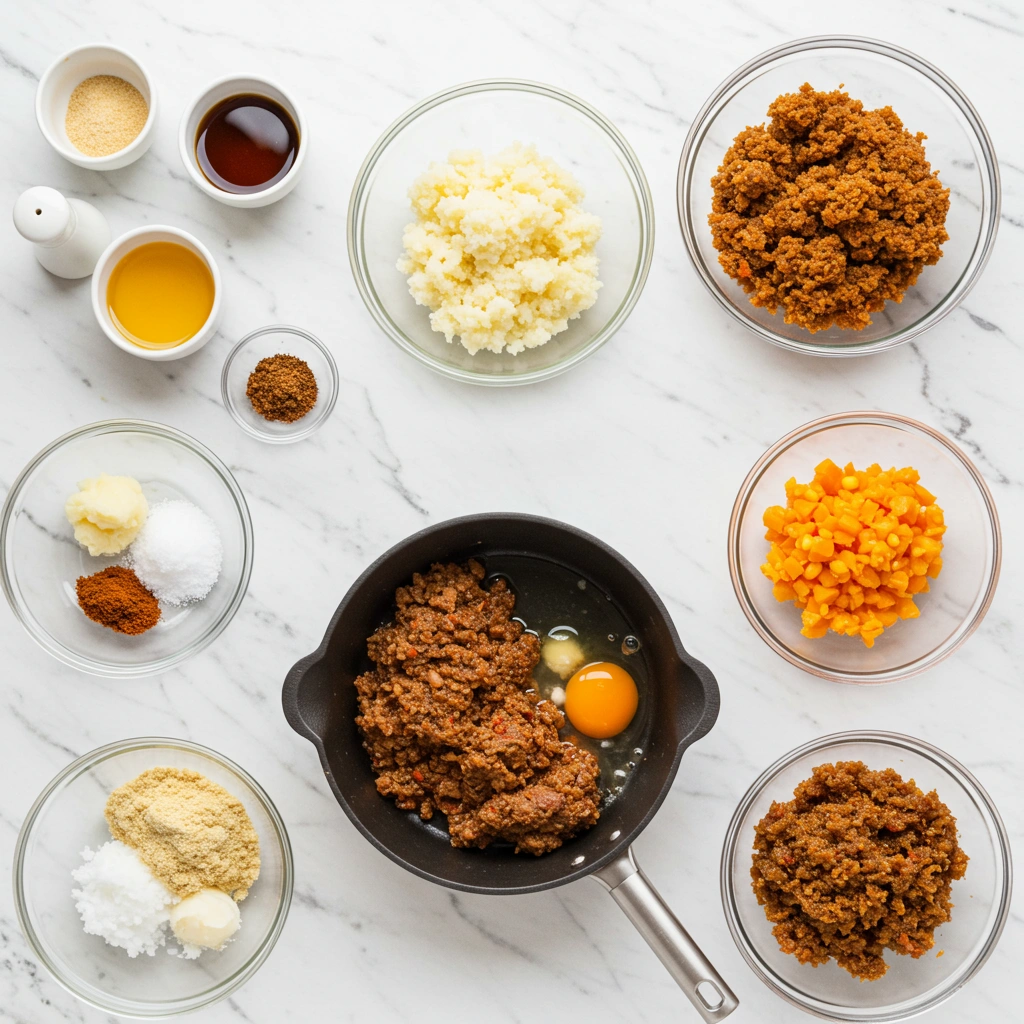
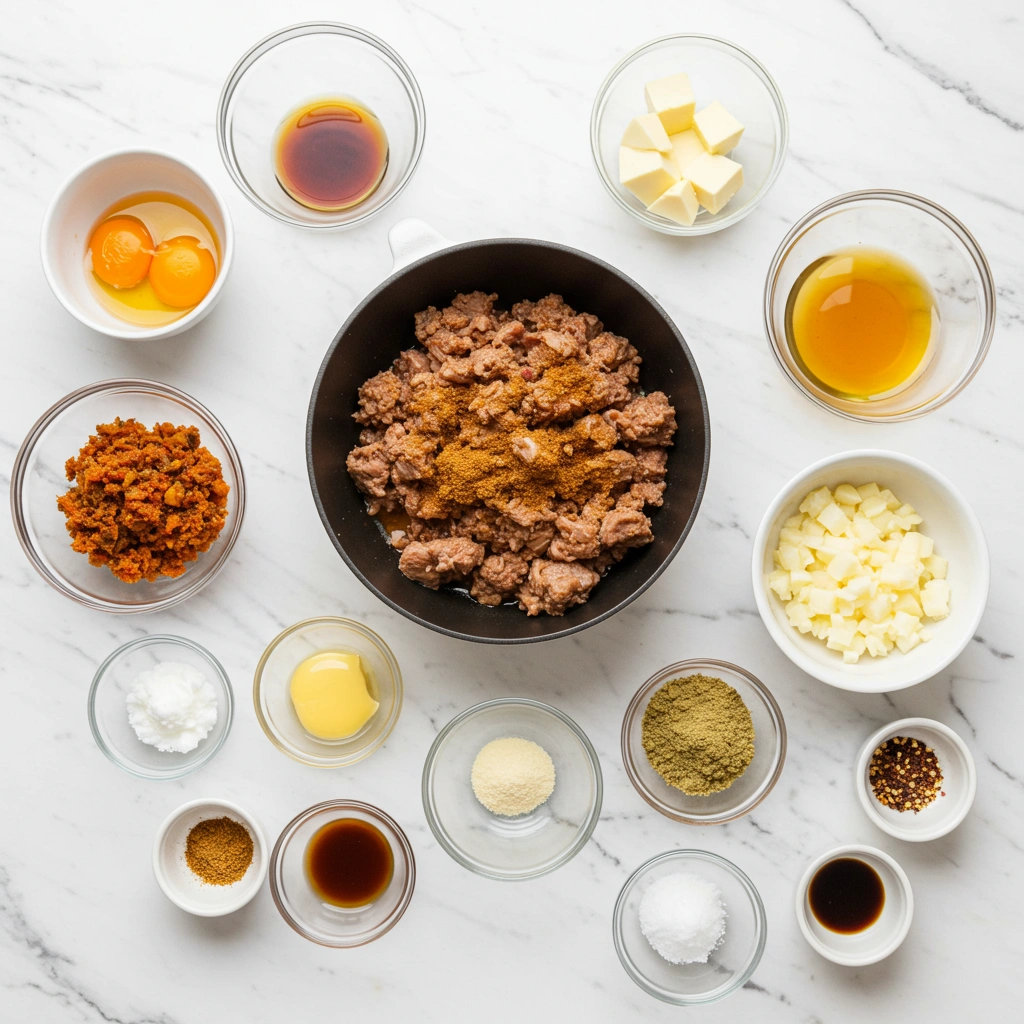
Ingredients
Meat Church Seasoning
- 2-4 tablespoons Holy Cow BBQ Rub Perfect for robust thigh applications
- 2-3 tablespoons Honey Hog BBQ Rub Ideal for balancing lean breast meat
- 1-3 tablespoons The Gospel BBQ Rub Versatile all-purpose blend
- 2-3 tablespoons Dia de los Muertos Adds complex heat and cultural authenticity
Primary Proteins
- 3-4 pounds Whole Chicken Free-range preferred for superior flavor development
- 2-3 pounds Chicken Thighs, bone-in, skin-on Higher fat content enhances seasoning absorption
- 2 pounds Chicken Breasts Choose thicker cuts for even cooking and moisture retention
- 3 pounds Chicken Wings Party wings or whole wings work equally well
Supporting Ingredients
- 1-2 tablespoons Kosher Salt Diamond Crystal preferred for consistent crystal size
- 2-4 tablespoons Brown Sugar Creates caramelization and balances heat
- 2-4 tablespoons Olive Oil or Avocado Oil High smoke point oils for proper searing
- 1-2 tablespoons Apple Cider Vinegar Tenderizes proteins and enhances spice adhesion
Instructions
Preparation
- Remove chicken from refrigeration 30 minutes before seasoning to allow even temperature distribution.
- Pat completely dry using paper towels, paying attention to cavity areas.
- Trim excess fat while leaving skin intact for flavor protection.
- Apply meat church seasoning in layers for optimal coverage.
- Allow minimum 30 minutes rest time before cooking.
Cooking
- Preheat cooking surface to 375°F (190°C).
- Position chicken breast-side up initially, then rotate after 25 minutes.
- Monitor internal temperature until it reaches 165°F (74°C).